All the new generation iPhone comes with no Home Button, as there is no room for a Home Button left due to the edge-to-edge display. Many users are coming from older versions of iPhones to newer versions and prefer something else to the gesture-based navigation system. If you are uncomfortable using the new gesture-based navigation, then all the latest iOS versions have a solution; there is an alternative called Assistive Touch.
![]()
The Assistive Touch floats around the display; apart from using it as Home Button, you can use it for single tap, double tap, 3D touch, and long press options to serve multiple functions. The Assistive Touch button has several menu options for quick access to the Control center and notification panel.
The Assistive Touch feature also helps users with older iPhone versions if their Home Button malfunctions. Below, you will learn how to enable this feature on your new or old iPhone model.
- Go to Settings.
- Look for the ‘Accessibility’ option.
- Now, go to ‘Touch’ and tap the ‘Assistive Touch’ option.
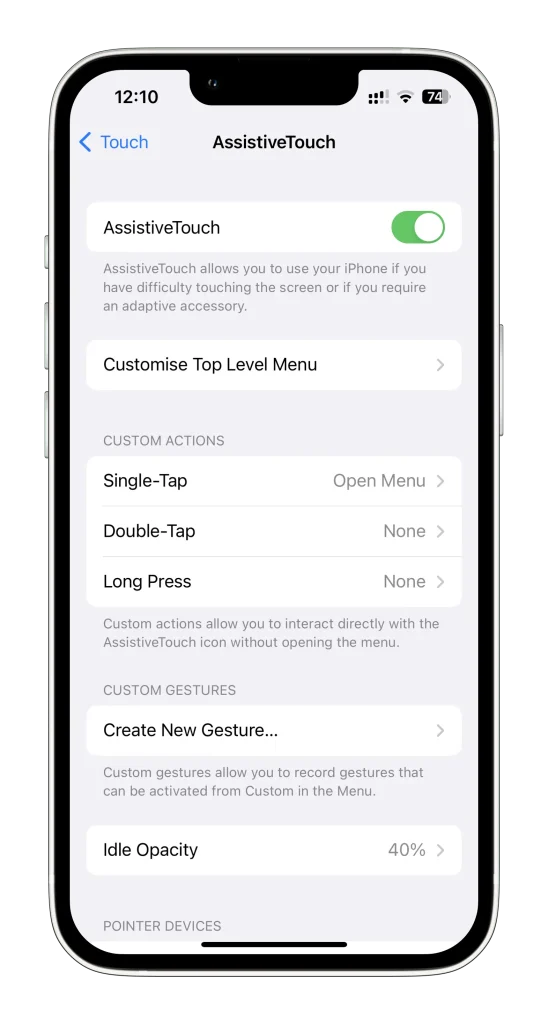
- Toggle on the ‘Assistive Touch’ page.
Once everything is done, you will see a floating Home Button on your iPhone or iPad Home Screen.
How to Customize Assistive Touch:
- Go to Settings, then Assistive Touch.
- Tap on Customize Top Level Menu
- Tap on any of the 6 icons to change its function.
- To add more functions to your menu, tap the ‘ + ‘ the one ‘ + ‘ icon will appear; tap on it and select tasks from the drop-down list.
- From the Custom Actions, select Single-Tap, Double-Tap, and Long Press; you will get a corresponding list to choose your desired functions from the list.
- You can create a custom gesture combined into multiple personalized touch gestures on the Create New Gesture option.
- Select Idle Opacity, which will adjust the dark or faded Touch Assistive button on your device screen while working on your phone.
- You can use Bluetooth or USB, Mouse Keys, Show Onscreen Keyboard, and Always Show Menu on the Pointer Device option.
- From Use Game Controller, you can control your phone navigation.
- The tracking Sensitivity option will help you use the Assistive Touch according to your convenience; you can customize the tracking speed upwards, downwards, left, or right respectively.
- You can use Dwell Control, Fallback Action, Movement Tolerance, Hot Corners, and timing for more personalized options.
- Using Confirm With Assistive Touch, you can confirm payments with Face ID instead of using a double tap on the side button.